
Steps in Properly Installing Loose Lay Vinyl Plank Flooring
Views: 0 Author: Site Editor Publish Time: 2026-04-05 Origin: Site


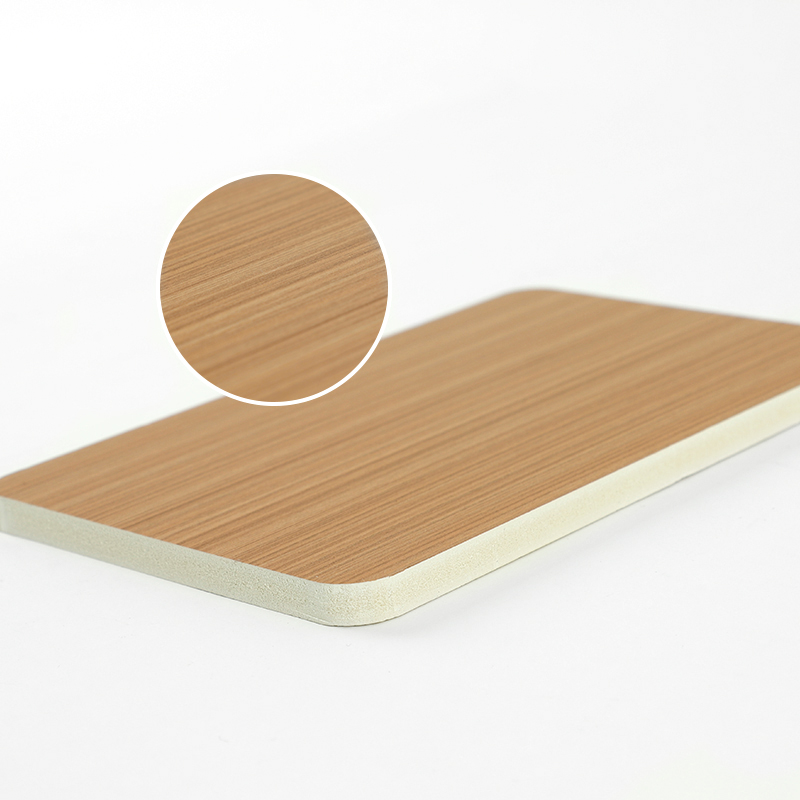
In the rapidly evolving commercial flooring industry, efficiency and durability are the two pillars of a successful project. Loose Lay Flooring has revolutionized the way contractors and business owners approach interior renovations by offering a system that eliminates the need for complex click-locks or full-spread permanent adhesives. This unique flooring solution relies on its massive weight, dimensional stability from fiberglass reinforcement, and a specialized anti-slip backing to remain securely in place under heavy foot traffic.
To properly install loose lay vinyl plank flooring, you must meticulously prepare a level subfloor, acclimate the planks for 48 hours in the installation environment, and utilize a perimeter-adhesion strategy to lock the layout. The process focuses on "butt-jointing" the planks tightly together, leveraging the 5.0mm thickness and friction-grip backing of premium products like Loose Lay LVT Vinyl Plank Flooring to create a seamless, non-shifting surface that is ready for immediate use.
This technical guide provides a professional-grade breakdown of the installation workflow. By following these industry-standard steps, you can ensure that your Loose Lay Flooring project meets both aesthetic expectations and the rigorous demands of commercial applications.
Table of Contents
Section |
Summary |
Pre-Installation Site Assessment |
Evaluating environmental conditions and subfloor integrity to prevent post-install failure. |
Critical Material Acclimation |
The scientific necessity of temperature stabilization for vinyl plank dimensional stability. |
Subfloor Leveling and Cleaning |
Detailed procedures for creating a pristine substrate for the friction-grip backing. |
Tool Inventory and Layout Planning |
Organizing the workspace and calculating the starting line to avoid thin edge pieces. |
The Perimeter Glue Application |
Step-by-step guide on applying pressure-sensitive adhesive to the room's boundaries. |
Main Field Plank Placement |
The core technique of dropping and locking planks using the "butt-joint" method. |
Cutting and Fitting Complex Areas |
Precision techniques for scoring, snapping, and fitting planks around obstacles. |

Pre-Installation Site Assessment
The site assessment phase involves verifying that the environment is climate-controlled and that the subfloor meets the strict moisture and pH requirements necessary for vinyl stability.
Before any Loose Lay Flooring reaches the job site, the HVAC system must be operational. Vinyl is a thermoplastic material, meaning it responds to environmental heat. The installation site must maintain a consistent temperature between 18°C and 29°C for at least 72 hours before, during, and after the installation. If the site is too cold, the planks become brittle and may not lay flat; if too hot, they may expand excessively, leading to peaking at the seams once the temperature drops.
Moisture testing is the next critical step. For concrete subfloors, you must conduct a Calcium Chloride test or use an electronic moisture meter. High moisture levels can lead to hydrostatic pressure, which may lift the planks or cause mold growth. Even though Loose Lay Flooring is waterproof, the trapped moisture underneath can degrade the subfloor or any perimeter adhesive used. Ensure the moisture emission rate does not exceed 5 lbs per 1,000 sq. ft. in 24 hours.
Finally, check the structural integrity of the base. Any old flooring like carpet, padded vinyl, or floating floors must be removed. The goal is to reach a solid substrate—either concrete, exterior-grade plywood, or well-bonded ceramic tile. Using high-quality materials like durable Loose Lay LVT ensures a great finish, but the foundation determines if that finish stays flat and quiet for decades.
Critical Material Acclimation
Acclimation is the process of allowing the loose lay planks to reach thermal equilibrium with the installation environment, preventing shrinkage or expansion after the floor is laid.
Acclimation is not a suggestion; it is a technical requirement for Loose Lay Flooring. When the product is shipped, it may have been stored in a cold warehouse or a hot shipping container. If you install "cold" planks into a warm room, they will expand as they heat up, causing the floor to buckle. To acclimate properly, remove the planks from their shipping pallets and stack them no more than three boxes high in the room where they will be installed.
Cross-stacking the boxes allows for better airflow around the material. The goal is for the core temperature of the Loose Lay Flooring to match the room's ambient temperature. This process typically takes 48 hours. During this time, keep the boxes away from direct sunlight, heating vents, or damp walls. Proper acclimation ensures that the dimensions of the 6x36 inch planks remain constant during the installation process.
During this window, you should also inspect the planks for any manufacturing defects. Batch numbers should be checked to ensure color consistency across the entire area. Since high-end 6x36 Loose Lay LVT Vinyl Plank features high-definition prints, shuffling planks from different boxes during installation will create a more natural and varied wood-grain appearance, avoiding "clumping" of identical patterns.
Subfloor Leveling and Cleaning
Subfloor preparation requires removing all contaminants and ensuring the surface is level within 3mm over a 3-meter radius to maximize the contact area of the anti-slip backing.
The performance of Loose Lay Flooring depends entirely on the friction between the plank's backing and the subfloor. Any dust, oil, or debris acts as a lubricant, causing the floor to slide. Start by sweeping and vacuuming the floor multiple times. If there are old paint spills or adhesive residues, they must be scraped or sanded off. Chemical adhesive removers should be avoided as they can seep into the subfloor and react with the vinyl backing later.
Levelness is the most common point of failure. Because these planks are 5.0mm thick and have a heavy fiberglass core, they do not "drape" over bumps. High spots must be sanded down, and low spots must be filled with a high-quality Portland-based patching compound. If the floor is not level, you will feel "give" or "bounce" when walking on the planks, and the seams may eventually pull apart because the friction-grip is not fully engaged with the substrate.
Once the floor is level and clean, verify the pH of the concrete. A pH between 7 and 9 is ideal. If the alkalinity is too high, it can damage the specialized backing of the Loose Lay Flooring. In some commercial cases, applying a subfloor sealer is recommended to create a dust-free, non-porous surface that enhances the "suction" effect of the loose lay technology.
Tool Inventory and Layout Planning
Effective layout planning involves snapping a central chalk line and calculating plank widths to ensure the perimeter planks are at least half the width of a full plank for stability.
Before laying the first piece of Loose Lay Flooring, you must organize your tools. You will need:
A heavy-duty utility knife (for the score-and-snap method).
A long metal straight edge or T-square.
A tape measure and chalk line.
Spacers (to maintain a 2-5mm expansion gap).
A 45kg roller (if using perimeter adhesive).
Start by measuring the room's width and length. Divide the total width by the width of the plank (6 inches). If the remaining fraction is less than 3 inches, you should shift your starting line to ensure the planks at both walls are of equal, substantial width. Use your chalk line to snap a perfectly straight line down the center of the room or along the primary starting wall. This line serves as your "anchor" to ensure the entire floor stays square.
Because Loose Lay Flooring is often used in large commercial areas, you must also plan for transitions. Identify where the vinyl will meet other flooring types like carpet or tile. Ensuring you have the correct transition strips on hand is vital for a professional look. Using the professional Loose Lay LVT Flooring specifications, you can plan the layout to minimize waste, typically aiming for a 5-10% waste factor depending on the complexity of the room's geometry.
The Perimeter Glue Application
For areas larger than 20 square meters, a 10cm band of pressure-sensitive adhesive must be applied around the perimeter and at 4-meter intervals to prevent lateral movement.
While the weight of Loose Lay Flooring is sufficient for small residential rooms, commercial installations require the "Perimeter Glue Method." This provides an extra layer of security against heavy rolling loads or sudden temperature shifts. Use a trowel or a roller to apply a thin, consistent layer of pressure-sensitive adhesive around the entire boundary of the room. This adhesive should be allowed to "flash off" until it becomes tacky and translucent—it should not transfer to your finger when touched.
In very large open-plan offices or retail halls, you should also apply a "grid" of adhesive. This means creating an "X" or a grid pattern every 4 to 5 meters across the floor. This prevents the "wave effect" where the entire field of flooring might shift slightly over time. The beauty of using pressure-sensitive adhesive is that it remains flexible. If a plank needs to be replaced, you can still lift it without damaging the subfloor or the surrounding planks.
Once the adhesive is ready, carefully lay the first row of planks along your chalk line into the glue. Use a hand roller to ensure the friction-grip backing is fully seated into the adhesive. This "anchor row" is the foundation for the rest of your installation. By securing the edges, you ensure that the interior "loose" planks are locked into a stable frame, providing the ultimate reliability for your Loose Lay Flooring system.
Main Field Plank Placement
The main field is installed by tightly butt-jointing the planks together in a staggered pattern, ensuring no gaps are visible and the friction backing is in full contact with the floor.
Once your anchor rows are set, you can begin the rapid phase of the installation. Pick up a plank of Loose Lay Flooring and drop it into place. The key is the "butt-joint"—you must push the plank firmly against the previously installed row and the adjacent plank. Because there is no click-lock mechanism, the tightness of the fit is what prevents moisture and dirt from entering the seams. There should be zero visible gaps between the planks.
Staggering the joints is essential for both strength and aesthetics. The end joints of the planks in adjacent rows should be offset by at least 20cm (8 inches). A "random" stagger pattern is usually preferred in commercial settings as it hides subfloor imperfections better than a rigid "brick" pattern. As you work across the room, avoid "sliding" the planks into place, as this can trap dust or debris in the joints. Instead, use the "drop and press" method.
Throughout the process, walk over the newly laid areas to feel for any movement. If a plank feels loose, remove it immediately to check for debris underneath. The high-density core of high-quality Loose Lay LVT provides a satisfying "thud" when it makes full contact with the floor, indicating a successful bond.
Cutting and Fitting Complex Areas
Cutting loose lay vinyl is achieved through the "score and snap" technique, using a sharp utility knife to cut the wear layer and then snapping the plank along the line for a clean edge.
The final step is fitting the planks against the walls and around obstacles like pillars or door frames. To cut a plank to length, measure the distance from the last full plank to the wall, minus a 2-5mm expansion gap. Mark the plank with a pencil, align your straight edge, and draw your utility knife across the surface. You do not need to cut all the way through; once the wear layer is breached, the fiberglass-reinforced core will snap cleanly when pressure is applied.
For complex shapes—such as a semi-circle around a pipe—it is best to create a cardboard template first. Trace the template onto the vinyl plank and use heavy-duty shears or a jigsaw with a fine-toothed blade for intricate curves. For door jambs, it is often better to undercut the wood of the jamb using a jamb saw, allowing the Loose Lay Flooring to slide underneath for a perfectly seamless look without the need for unsightly caulk.
Once the final planks are in place, remove all spacers. Install baseboards or cove molding to cover the expansion gaps, ensuring that the molding is fastened to the wall and not to the flooring itself. This allows the floor to "breathe" slightly with temperature changes. A final roll with a 45kg roller over the entire surface (especially the edges) will ensure that every inch of the anti-slip backing is engaged, completing a professional installation of your Loose Lay Flooring.
Summary
The successful installation of Loose Lay Flooring is a systematic process that prioritizes subfloor preparation and environmental control. Unlike traditional flooring that requires permanent commitment through heavy adhesives, the loose lay system provides a high-performance, removable, and repairable surface that is ideal for the modern B2B environment. By adhering to the 48-hour acclimation rule, ensuring a level substrate, and utilizing the perimeter glue method, installers can deliver a floor that combines the beauty of natural wood with the industrial-grade resilience of LVT.
Whether you are fitting out a small boutique or a massive commercial office, the principles remain the same: clean, level, and tight. The 5.0mm thickness and the advanced friction-grip technology of the 6x36 Loose Lay LVT Vinyl Plank make it one of the most forgiving and efficient materials to work with in the contemporary market. Following these steps ensures a floor that doesn't just look good on day one, but remains stable and beautiful through years of rigorous use.

